For as long as I can remember
I’ve feared my mother would
die from dementia
Forget everything she’s done
Forget her children, her travels,
her perseverance
Leaving an abusive marriage
Raising children as a single mother
Making a new life of her own
Her boyfriend, her grandchildren
and great grandchildren
all forgotten and lost
To the fog of the brain
The crippling of the body
The slow descent to a miserable end
That time approaches quickly
she’s near the end of life
already gone mentally
Her body refusing to let go
as she lies there
unable to do anything
other than breathe and moan
It’s not the end she deserves
but it’s the hand dealt by the Universe
A sad end for a strong woman
who did her best for her family
through difficult and tragic times
Good-bye Mom, go into the light
Where you’ll remember again
that you were loved.
As My Mother Lies Dying
Loss
Grief is fluidand like the ocean it has waves some just wet your feetand some are tsunamis Worst are the sneaker wavesthat come out of nowhereand drag you out to choke and drown in a sea of your own tears ---Dedicated to my friend Sean Reinert … [Continue reading]
Celebration
Celebration I should be dead by nowbut I refuse.In 1998 I became ~ otherI became ~ positiveTold that I had twentymaybe twenty-five years to live, most of them ill.I stand, I live, I am healthyand I remain defiant.I will live.I will outlive you … [Continue reading]
After Gertrude
Is it? Was it?Could it be?Bliss,rapture,joy, toys, child, man,death cares not. I just got,got good,got together,forever,eternity,love's prison cell,death sentence, marriage vows,In the halls of just us ball and chainforced labor,children,out of … [Continue reading]
San Francisco
Fog tumbles over the mountainan avalanche incascading sheets of white. The City lays before me silent,in the late afternoon sun-setting time. Wind rushes by as it plummets into the cityscape sprawled out below. Slowly it succumbs to … [Continue reading]
A Quieting
Yeah, it's gone quiet. - Happens here and there. Cooking, not writing, but taking notes. Busy being busy, stay tuned, the search for balance continues.... … [Continue reading]
Baked Sundays: Epic Baking FAIL!
This is an ancient draft post from way back before I started culinary school. I never got around to finishing it. Here it is... Every now and then even the most experienced cooks and bakers fail. This was one of those times. "What the … [Continue reading]
Baked Sundays: Sunflower Butter Cookies With Cranberries
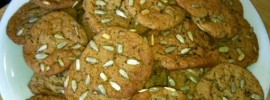
As there are more and more nut allergies (or perceived to be) these days, I decided to play with a classic peanut butter cookie recipe and swap the peanut for sunflower, and then add a little something in the form of ground cranberries. They add a … [Continue reading]
In Absentia, Memoria, Florida. Part One

Starting with silliness and at the end of the story, my flight home departs from Orlando, thanks to my friend's elite status I got priority boarding which meant having time to sit and watch everyone else board, and I've realized that there is a whole … [Continue reading]